Just so you know, as an Amazon Associate we earn from qualifying purchases made via bold red links, buttons or images.
Last Updated on November 5, 2023
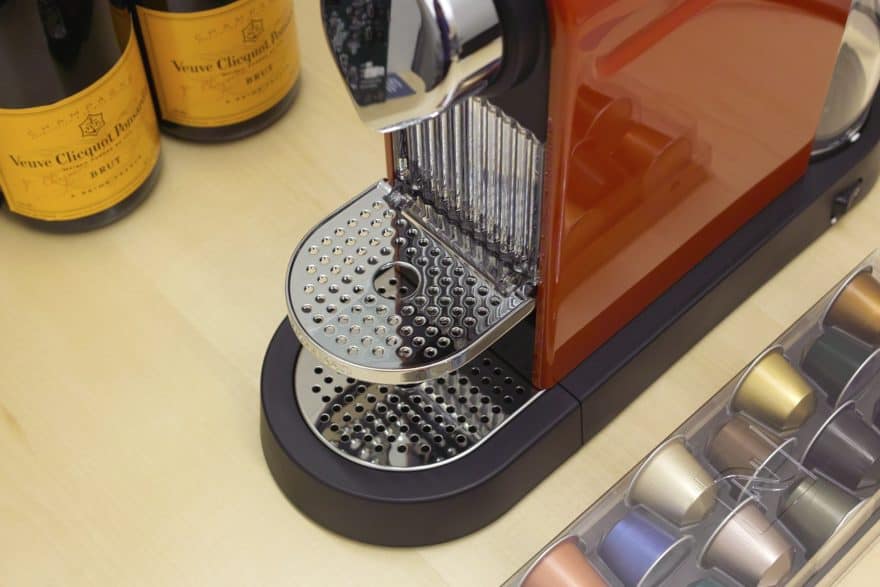
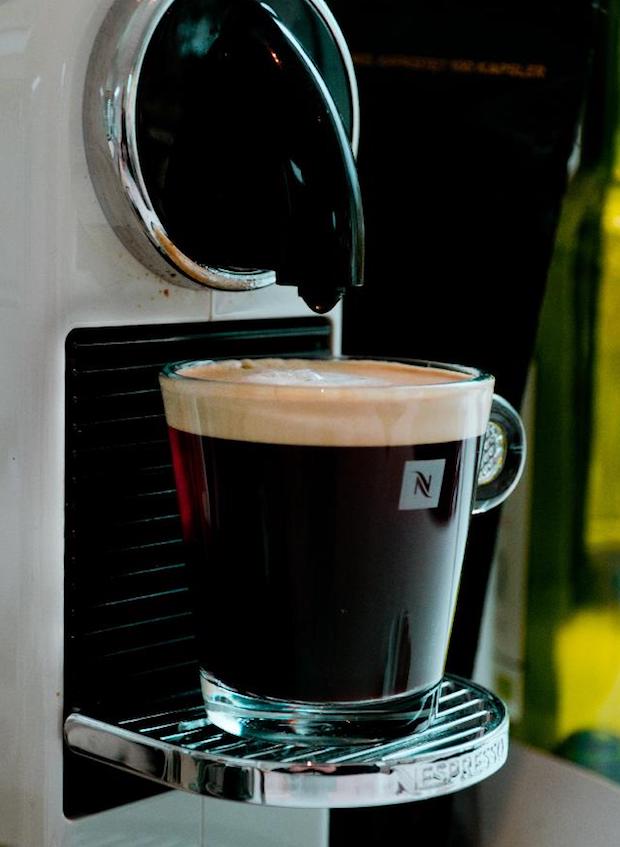
You finally treated yourself to your dream Nespresso machine—or maybe you just found one in your Airbnb—and you can’t wait to enjoy rich, creamy, cafe-style coffee beverages right where you are. You’ll be off and running in no time. Getting that barista-quality beverage has never been easier.
https://m.media-amazon.com/images/I/418Qjp+uqlL.jpg
I’m going to go over how to use your Nespresso machine. If this isn’t your own machine but one that you’ve come across in your travel accommodations, you can skip ahead to the “How to brew Nespresso” section. If you’ve just bought a machine, there are a few quick things you should do before you get started. I’ve also got a few tips for optimizing your machine’s performance and keeping it in top shape for years to come.
Before first use
I know you’re excited to brew your first delicious coffee, but before you dive in, it’s important to know how to rinse and prime your Nespresso machine. The rinse cycle is slightly different for Nespresso’s two lines, but the first few steps are the same.
For the Original line of machines
- Remove the water reservoir and give it a thorough rinse both inside and out with regular tap water. Dry the outside if you’re worried about drips and then fill the reservoir at least halfway.
- Turn your machine on by pressing the “lungo” or “on” button. The light will flash for about 25 seconds while warming up. When the light stops flashing, your machine is ready to go.
- Ensure the adjustable drip tray is secure, and place a large mug on it.
- We are going to run four rinse cycles (essentially brew cycles without coffee). Simply push the “lungo” button and let the cycle run its course. Do this four times. Depending on the size of your mug, you may need to empty it periodically, so keep an eye on it.
- Check the water reservoir and top up if needed.
- You’re ready to brew!
For the Vertuoline
- Follow Steps 1-3 above, ensuring you use a large mug.
- Lock the brew head in place by turning the lever to the “lock” position.
- Push the brew button on the head three times quickly. This will activate the rinse feature, which will take between 2-5 minutes. You only need to do this once.
- Check the water reservoir and top up if needed.
- You’re ready to brew!
Now that the machine is fully rinsed and ready to go, you’ll have a delicious coffee in under a minute. It’s already warmed up and fully primed since you did your rinse cycle, but if this were any other day, follow the steps below.
How to brew Nespresso
1. Fill the water reservoir
You want the water reservoir to be at least a quarter full each time you use your machine. If your family will be making several coffees, fill accordingly. It’s best to empty the reservoir every day and give it a quick rinse so that minerals don’t build up. This will result in a better-tasting cup of coffee and extend the life of your machine. If you use the machine throughout the day, just ensure you top up the water levels as needed, and empty and rinse the reservoir at the end of the day.
2. Place your cup
Pick your favorite cup, which will probably change depending on your chosen beverage style, and place it on the drip tray under the brew head.
3. Warm up your machine
If you’re an energy conservation nut like I am, plug in your machine (unplugging appliances when not in use reduces “vampire” energy use). If you keep your machine plugged in for convenience and ease of use, simply press the “lungo” or “on” button to fire it up. The light will flash while the machine is heating up, about 25 seconds, and will remain solid when it’s ready to go.
If you’re in a rush, simply move to the next step to have a decent coffee in under a minute. If you’ve got a few seconds to spare and want to raise the quality of your brew, run a “lungo” cycle with just hot water and no coffee pod first, to further prime the machine and warm all its components. Discard the water from your cup, which is now warm as well, and replace it under the brew head.
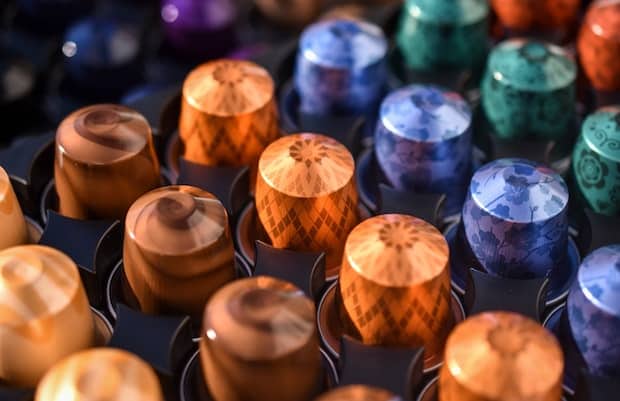
4. Choose your capsule
You can do this during step 3. Finding the right flavor profile and intensity level (yes, Nespresso blends vary in their caffeine content so you can tailor your levels throughout the day) will likely take some experimentation. Each Nespresso machine comes with a variety pack of capsules to get you started. If you find one you really love, I recommend removing the capsule from the collection drawer immediately after use and setting it aside so you can easily remember which blend you liked best. Once you’ve tried several different blends, you can either order your favorites, or try a different variety pack to keep experimenting.
If you have a machine from the Original line, there are now a wide variety of third-party options for purchasing capsules as well, often at lower prices. Keep in mind that Nespresso quality is only guaranteed when using their capsules. If you have a machine from the Vertuoline, it currently takes only Nespresso capsules.
5. Insert your capsule
For the Original line
- Lift the lever to access the capsule port.
- Pop in your chosen capsule. They will only fit in one way, which is clearly marked by the shape of the port.
- Close the lever.
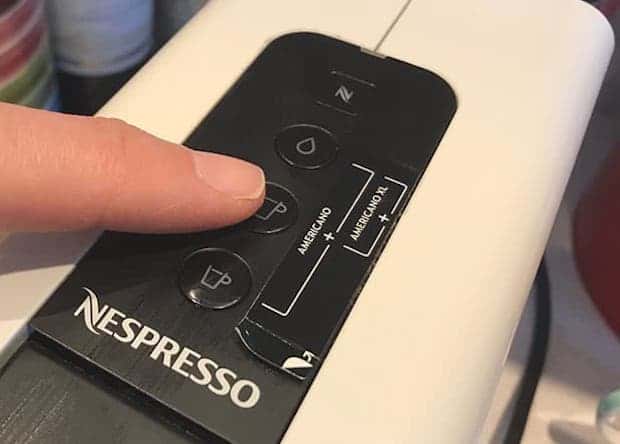
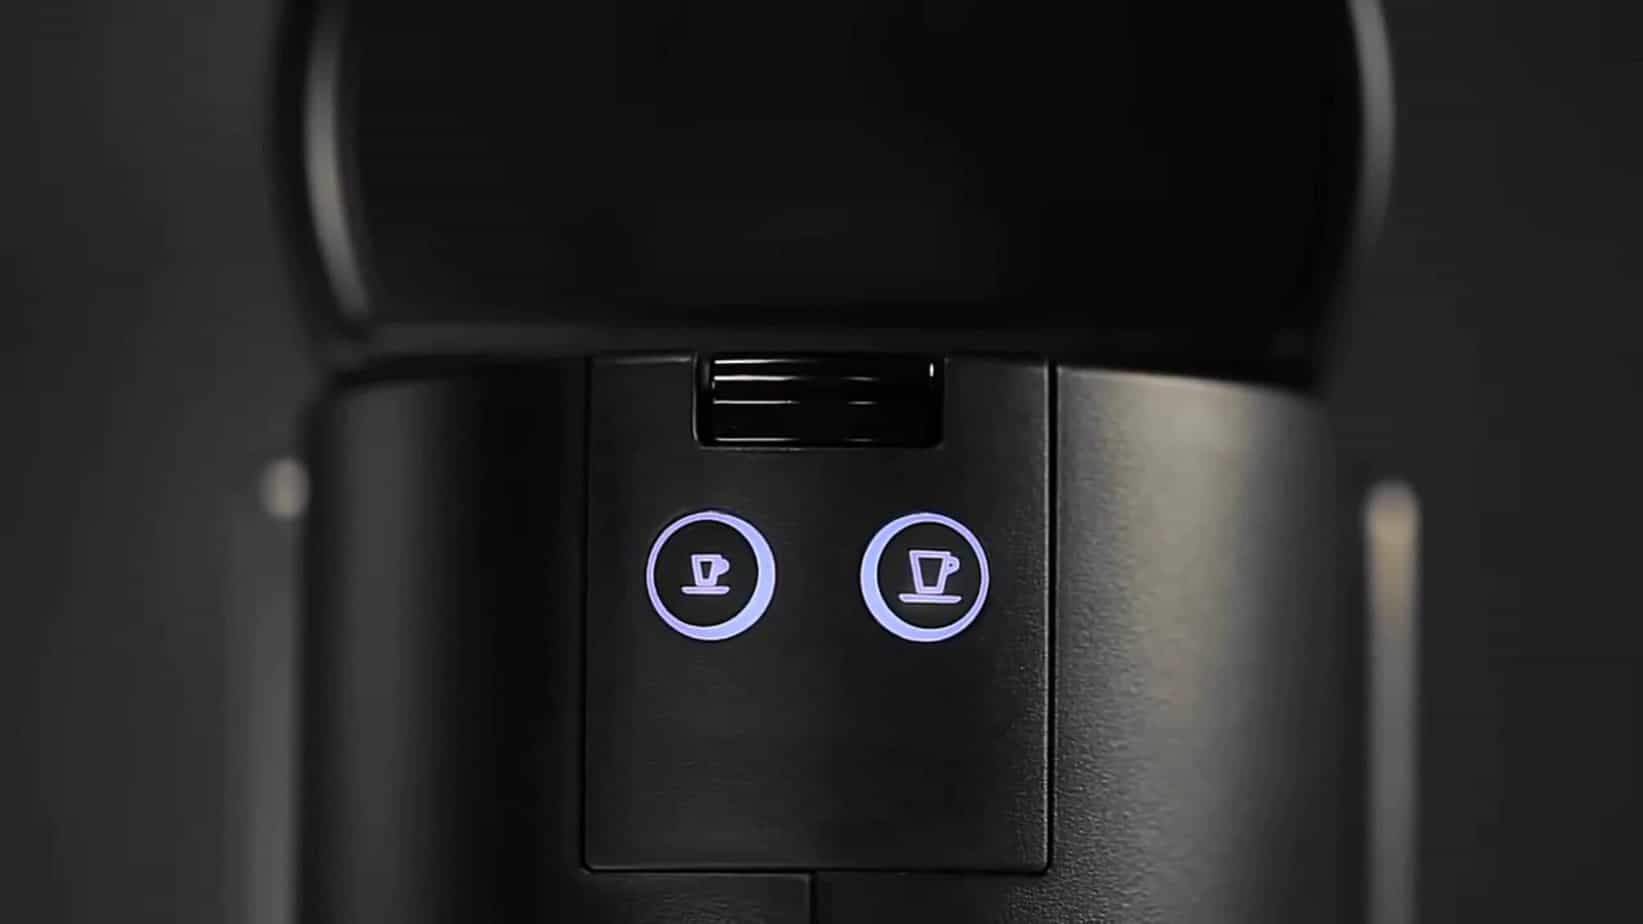
- Press the brew button for your desired size of espresso.
Hot tip: A “lungo” or long espresso can sometimes over-extract your coffee. If you’re finding a slightly bitter taste, then try adding hot water to a regular espresso to make an Americano instead. Many Nespresso machines let you top up manually with hot water at the push of a button, or you can heat it in your kettle. If you prefer a larger coffee, this will result in a much smoother style.
For the Vertuoline
- Turn the lever to the “unlock” position.
- Lift the brew head to access the capsule port.
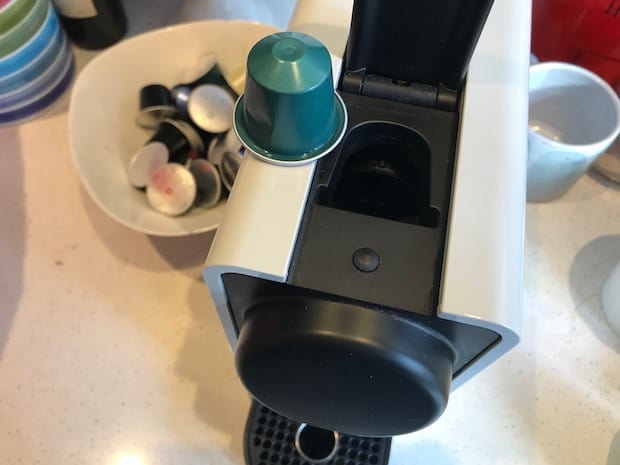
- Pop in your chosen capsule, dome side down.
- Lower brew head and turn lever to “locked” position.
- Push the brew button. The Vertuoline uses bar codes on the capsules to determine the size of brew, so it only requires a single button.
6. Release the capsule
You must release the spent coffee capsules into the collection drawer after each use.
For the Original line, lift and lower the lever. That’s it. The capsule will be released into the collection drawer. This happens automatically the next time you open it to brew another coffee.
For Vertuoline machines, move the lever to the “unlock” position, lift the brew head, and then lower it. The capsule is now released.
All Nespresso machines have some capacity for spent capsules, so it’s not necessary to remove them from the collection drawer after each use. Check your owner’s manual for the capacity of your model, and ensure you empty and rinse the drawer regularly.
You can recycle your Nespresso pods, and we have plenty more about that in our post on Nespresso’s sustainability initiatives.
7. Rinse your machine (if you have time)
This is not an absolutely necessary step. If you’re in a rush, by all means brew and go. That’s why we love these machines. If you do have a few extra seconds, though, repeat the earlier rinse process after brewing as well. Place a cup under the brew head and run a quick cycle (“espresso” or “lungo” are both fine) to give the machine a rinse. This will lead to better-tasting coffee and prolong the life of your machine.
8. Final clean-up
Wipe up any drips or splashes, and empty the drip tray if you had any spills. Once you become proficient with your machine, clean-up is almost nonexistent. If you don’t plan to use your machine again that day, and you’re not on the run, empty the water reservoir to deter mineral buildup.
I know this seems like quite a few steps, and it might take a few minutes the first couple of times as you familiarize yourself with the particulars of your machine. Once you know your way around, this whole process only takes about two minutes—maybe three if you’re just waking up.
Nespresso cup size programming
If you want to fine-tune your brew, Nespresso lets you program your cup size by customizing how much water runs through each brew cycle. This will strengthen or weaken your brew as desired.
To do this, instead of pressing and releasing the brew button as you normally would, hold the button down throughout the brew process. Once your desired level of coffee is reached release the button. This is your new preset volume, and until you reset it, the button will brew that volume moving forward.
Returning your machine to the Nespresso presets is quite simple as well, but the process differs depending on the machine model. It usually involves some form of depressing the button as you turn the machine on. Check your owner’s manual to find the particular method for your specific machine type.
Nespresso machine maintenance
If you thoroughly rinse your Nespresso machine on a regular basis, and give it a quick wipe when needed, there is little else you need to do. You should descale your machine every few months. How often will depend on the hardness of your water, how thoroughly you rinse the machine after each use, and whether you empty the water tank every day.
We have another post that provides a detailed look at cleaning and maintaining your Nespresso machine. As always, check your user manual for the specifics of your particular model.
Aeroccino milk frother
If you prefer a milk-based espresso beverage and bought your Nespresso machine for lattes, I highly recommend adding the Aeroccino milk frother to your Nespresso setup. There are some models that have integrated milk canisters and steam wands, but they are much more expensive and the Aeroccino is widely regarded as not only being easier to use, but also better at texturing milk.
https://m.media-amazon.com/images/I/31CORy8bnbL.jpg
The Aeroccino is extremely versatile as it can froth cold milk for iced beverages, or heat and froth milk for non-coffee beverages as well. Imagine a cozy hot chocolate or London fog in the winter. Delicious!
How to use the Aeroccino
1. Fill with your chosen milk (dairy or alternative)
If you want a foamy beverage, fill to the lower line. For warm milk without foam, fill to the upper line.
2. Push the button
For warm milk push the button once. A red light will appear. In 15 seconds you’ve got gorgeous warm milk with or without silky foam.
For a cold froth, hold the button down, a blue light will appear. In 15 seconds you’ve got frothy cold foam for your iced latte or blended coffee.
3. Add to your beverage
Simply pour or scoop your frothed milk onto your chosen beverage.
4. Rinse
Give the Aeroccino canister a quick rinse inside and out, and you’re done!
Nespresso coffee machines are some of the most user-friendly machines I’ve encountered. They now have a wide variety of models in both their Original and Vertuoline, which have different features and capabilities but all remain extremely easy to navigate.
Hopefully this gave you a jumping-off point with your new machine. Once you get the hang of it, visit our other post for more Nespresso tips and tricks. The goal is always to arrive at the best possible brew, and Nespresso is definitely our pick for capsule-based machines. If you’re on the fence about Nespresso or not sure which machine is right for you, we are working on a lineup of Nespresso machine reviews to help you along.
Image at top: © Jun Seita | Creative Commons