Just so you know, as an Amazon Associate we earn from qualifying purchases made via bold red links, buttons or images.
Last Updated on December 10, 2023
The AeroPress is an efficient, elegant brewing system that has broken out of the exclusive hipster coffee scene and found its way into the mainstream. It found its way into my kitchen almost a decade ago, and I’ve been experimenting and making excellent coffee with it ever since.
The beauty of the AeroPress is in its simplicity, and yet it allows for a wide range of customization. By adjusting your grind size, coffee amount, water temperature, and brew time, you can affect your end result in both subtle and extreme ways.
The AeroPress is known for producing a bright, clean, smooth brew that highlights the unique qualities of a specific roast. I love rotating through different single origin coffees to explore their complex and nuanced flavor profiles.
I do, however, often crave a deeper, richer cup. I used to turn to my French press for this until I discovered the inverted AeroPress method. I haven’t looked back.
If you don’t already have an AeroPress, you’ll find that it’s a highly affordable device and great for when you want a somewhat hands-on experience making coffee:
https://m.media-amazon.com/images/I/31-Qegr0v+L._SL500_.jpg
Check availability
Why the Inverted Method?
One of my favorite things about my AeroPress is how much room for experimentation there is. It’s an extremely forgiving method of brewing and nearly impossible to mess up. If you use high-quality coffee beans and have your ratio in the correct ballpark, you’ll almost always end up with delicious cups of coffee. Fine-tuning and adjusting your inputs can lead to an extraordinary brew with complex aromas and nuanced flavors and can help you find exactly the taste that’s right for you.
The inverted method allows your coffee grounds to become fully saturated as a result of brewing via immersion (essentially steeping your coffee grinds in hot water) rather than the traditional AeroPress method of using pressure to force water through your coffee grounds. This allows for increased extraction and a deeper, more full-bodied cup of coffee.
The nice thing about this method is that you still plunge your coffee through the paper filter, so although you get something akin to the richness of a French press, you don’t get the same sediment or “solids” in your cup. The mouthfeel won’t be quite as luscious as with a French press, but will fall somewhere between it and the traditional AeroPress method.
If this sounds like it’s up your alley, read on for details of the inverted AeroPress method.
You have your choice of paper filters or a re-useable metal filter with the AeroPress:
https://m.media-amazon.com/images/I/31WWohOgo9L._SL500_.jpg
Check availability
https://m.media-amazon.com/images/I/51HkuYmNo6L._SL500_.jpg
Check availability
How To Brew Coffee With the AeroPress Inverted Method
1. Seal the plunger
With the filter cap removed, slide your plunger into the main chamber of your AeroPress so that it forms a tight seal. Stop as soon as you achieve that seal. It should look similar to when you cap your chamber with the plunger during the traditional process.
Invert your press, resting the top of the plunger on your counter or other solid surface.
2. Add coffee grounds
Grind your coffee and place into the main chamber. There is no correct ratio, but for best results you want somewhere between a 1:14 and a 1:16 coffee-to-water ratio. I prefer a stronger brew, so I tend toward the higher end myself, using around 16 grams of coffee and 240 milliliters of water. If you’ve already been experimenting with your AeroPress, you likely know your preferred ratio. If not, play around until you perfect it.
The ideal grind size for an AeroPress is slightly finer than for a drip or pour over—about the coarseness of table salt.
3. Add water
This step can be as simple or as complex as you like. If you like to keep things streamlined, simply add water to about 1/4” from the top of the chamber. If you want to allow for a “bloom”—which is when your coffee releases CO2 and other gases, lending to a sweeter, smoother cup—then pour just enough water to cover your grinds, or about 50 milliliters.
To be clear, there is no harm in not allowing for the bloom. Many people report tasting no difference in flavor when they allow for the coffee bloom versus when they don’t. I personally use a two-step method and find I get a slightly more expressive cup this way.
There is also quite a lot of debate around water temperature: some say it should be between 195-200 degrees Fahrenheit and others say it should be much lower, closer to 175 degrees Fahrenheit.
For the sake of simplicity (and particularly if you don’t have a kettle with a thermometer), remove your water from the boil and let it rest for 30-45 seconds. This should do the trick.
4. Stir
Whether you added all the water or just enough to achieve a bloom, give your coffee grounds a gentle stir to ensure they are evenly saturated.
5. Steep
If you filled your chamber all the way, wait one to two minutes, depending on your personal preference. The longer you let it steep, the stronger your coffee will taste. Just be sure not to leave it longer than two minutes, or it will start to over-extract, imparting negative qualities, such as bitterness, into your cup.
If you are blooming, wait 30 seconds, and then add the rest of the water, stir again, and wait one minute.
6. Attach filter and cap
If you’re using a paper filter, you may want to rinse it first to avoid any paper flavor.
7. Invert
Invert your AeroPress so that it sits on your mug as usual.
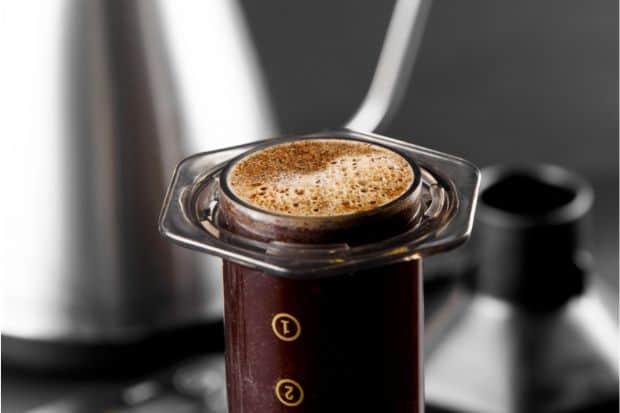
8. Plunge
Plunge slowly, stopping when you hear a slight hiss. This should take about 20-30 seconds. Don’t plunge to the absolute bottom of your chamber as this will push solids through your filter and impart a bitter taste into your coffee.
9. Dilute (optional)
Depending on your taste, add some hot water to dilute.
Although this is a rather long list of steps, the process is actually quite simple, and the result is extraordinary. It does add some complexity to what is otherwise revered for being one of the simplest coffee brewing methods, but the beauty is that you can still use the traditional method/normal method whenever you like. The inverted method is just a flip away when you want that slightly richer flavor of amazing coffee.
As a coffee drinker who used to alternate between my French press and my AeroPress, the inverted method is now my go-to. Give it a try on those days when you’re craving a richer, more espresso-like coffee flavor.
If you have a milk frother handy, you can make a short, concentrated brew that can act as a base for your favorite milk-based beverage.