Just so you know, as an Amazon Associate we earn from qualifying purchases made via bold red links, buttons or images.
Last Updated on November 5, 2023
Coffee and corn have a lot in common. Both come from the fruit of a plant. A raw coffee bean and a raw popcorn kernel are both hard little nuggets that can be turned into something completely different and delicious by applying a little heat.
It makes sense, then, that you can transform either of them using exactly the same device: a Whirley Pop Popcorn Popper.
Whirley Pop coffee roasting is almost as easy as making popcorn. It produces a nice, even roast. The only home coffee roasting method that might be easier is roasting in the oven, but there’s little chance you will achieve the same evenness to your roast that way.
What is a Whirley Pop?
The Whirley Pop Popcorn Popper is a stove top popcorn maker invented in 1980 by an Indiana farmer named Mike Williams. It is still produced today by his family’s farm, Wabash Valley Farms, and capably imitated by brands such as Franklin’s below:
Whirley Pop Coffee Roaster/Popcorn Popper
https://m.media-amazon.com/images/I/51nJnHEK4TL._SL500_.jpg
Check availability
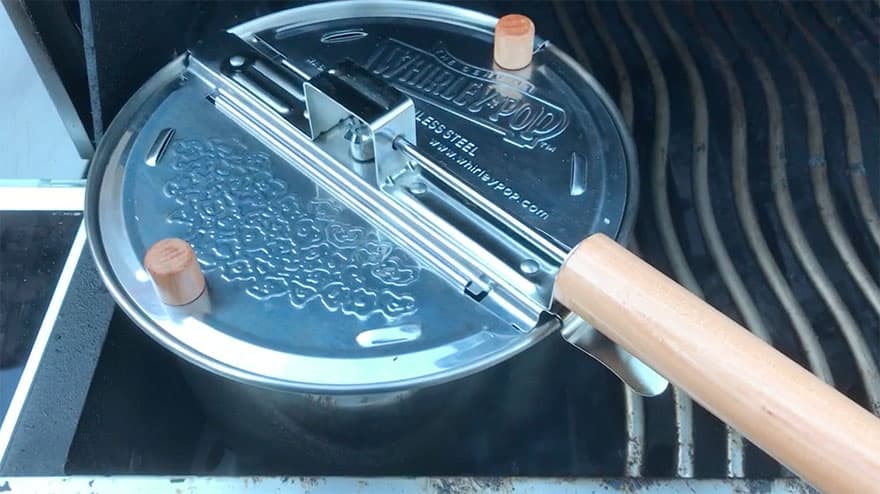
Williams’ innovation was planting a couple of slim rotating rods in the bottom of a simple stainless steel or aluminum pot and connecting them via gears to a crank in the pot’s handle. When you pop popcorn—or roast coffee—you don’t have to stand there shaking and swirling the pot. You just calmly turn the crank and those slim rods rotate like helicopter blades, stirring whatever is in the pot.
This important when you roast coffee, because it helps the beans roast evenly.
How do you roast coffee in a Whirley Pop?
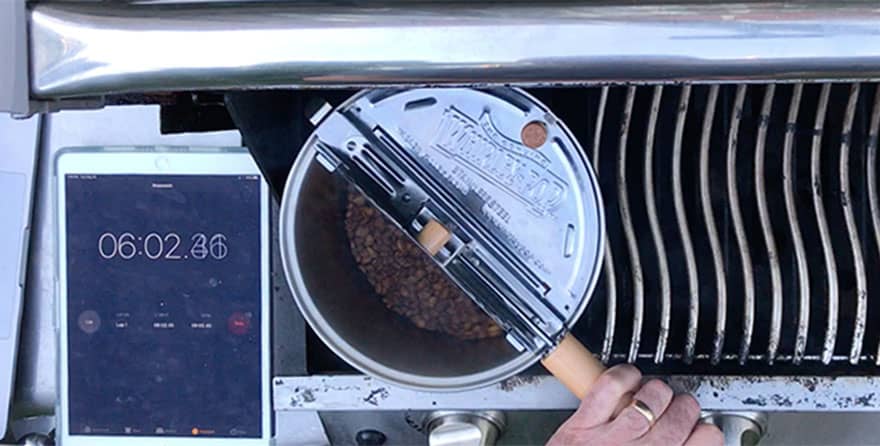
When I roast coffee at home, I use the Whirley Pop outdoors on my barbecue grill. Want to see how easy it is? Watch this five-minute video of an actual roast in my backyard:
You can roast indoors, but as you see in the video, coffee roasting produces a lot of smoke—particularly in the later stages of a roast. Roasting coffee in your kitchen requires a powerful ventilating fan above your stove, a lot of open windows, and an easy way to temporarily disable your smoke alarms. The darker you roast, the more smoke control you’re going to need.
If you roast outdoors on the barbecue, the smoke just carries away into the breeze. It’s beautiful.
Another advantage of using the barbecue rather than a gas stove coffee roaster is that the grill has a wider, more even heat base. A stovetop burner won’t apply heat evenly to the bottom of your pot, so your roast could be uneven regardless of how much you stir.
Before you roast, you should review our post on Coffee Roasting for Beginners and in particular the sections on coffee roasting basics and coffee roasting stages. That post explains the chemical changes that occur in coffee beans as you roast them, and the stages they pass through as they roast. These are things you’ll be watching for.
What you’ll need
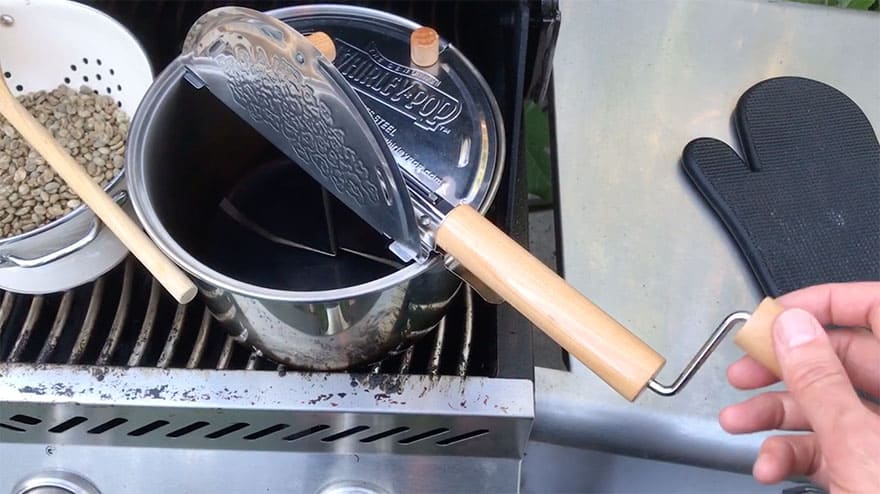
My personal system for roasting outdoors involves the following equipment:
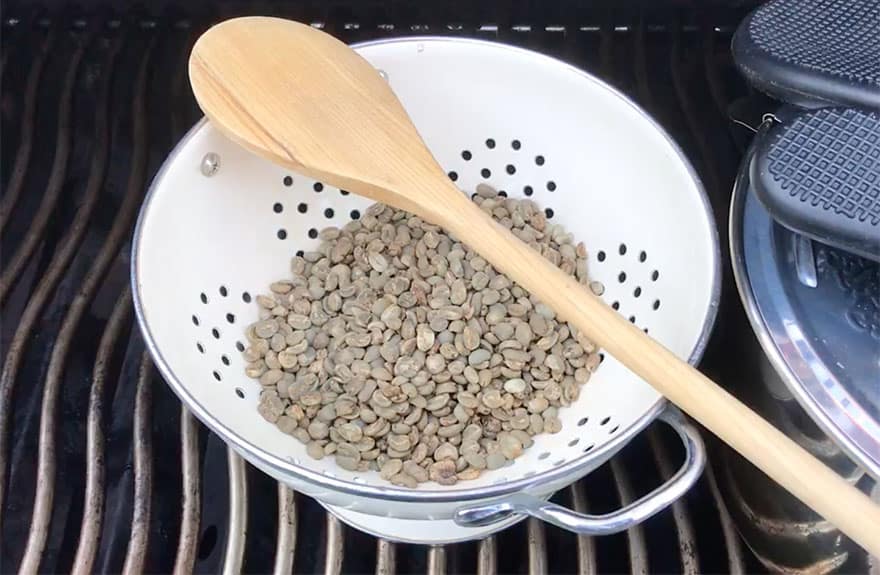
- raw green coffee
- kitchen scale (optional)
- steel or enamel colander
- wooden spoon
- oven mitt
- Whirley Pop Popcorn Popper
- timer (a smartphone works fine)
Instructions for roasting with a Whirley Pop
Step 1: Weigh your coffee
I typically dispense 250 grams of raw coffee for each roast. That’s enough to last me about a week.
It doesn’t really matter how much you use. Just know that less coffee will roast more quickly.
Whatever quantity you use, try to use the same amount each time you roast. The craft of roasting is about trial and error, tweaking one variable at a time. If you keep changing the quantity of beans, you’ll have a hard time understanding what impact time and temperature are having on your roasts.
Dump your beans into your colander, insert your wooden spoon, grab your oven mitt and Whirley Pop, and take it all out to the grill.
Step 2: Preheat the Whirley Pop
You want the pot at a high temperature to start. It will drop immediately when you pour the cold beans in, so get some good heat going first.
You’ll probably need only one side, or one burner, of your grill. I remove the grate so I can place the Whirley Pop directly on the metal slats just above the burner.
Turn it up to full heat immediately and place the Whirley Pop on the slats with the lid closed. Leave it for 4-5 minutes to heat up.
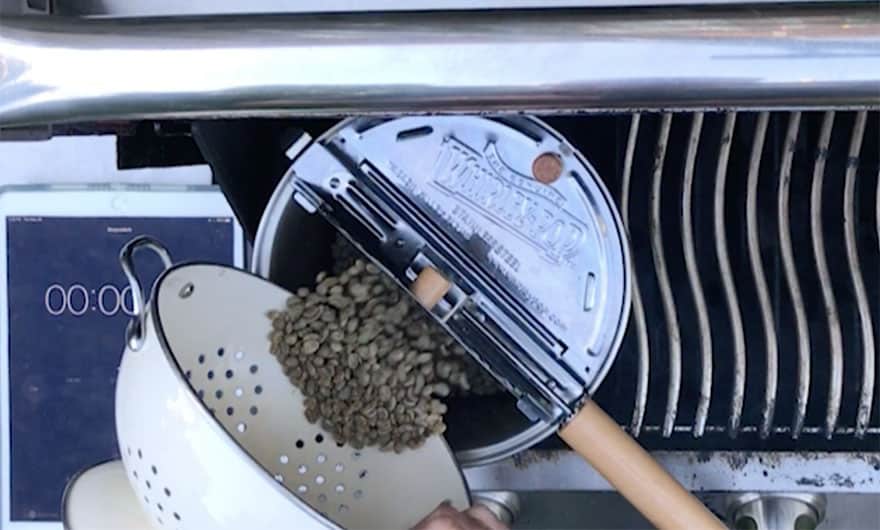
Step 3: Pour in the coffee beans
When you feel a good amount of heat inside the pot, pour the coffee beans in from the colander, close the lid on the Whirley Pop and start your timer.
Why are we timing?
There is no recipe for roasting coffee beans. Not really.
At the professional level, they have time and temperature all figured out on a computer so they can replicate it for every roast, but with this method you’re going to eyeball it. You’re going to roast the beans until they look the way you want them to look.
It’s good to know how long that takes. It’s also good to know how the beans look at various stages along the way, and how long it took them to get there. This provides a baseline that will allow you to experiment and improve future roasts.
In coffee roasting, experimenting mostly means adjusting heat. It all comes down to when you adjust the heat, and by how much. The more you roast, the more you taste, and the more you think about how your roasting may be affecting the taste, the better you’ll get at it.
Being able to roast great coffee by sight and intuition alone is a great skill, and it comes with experience.
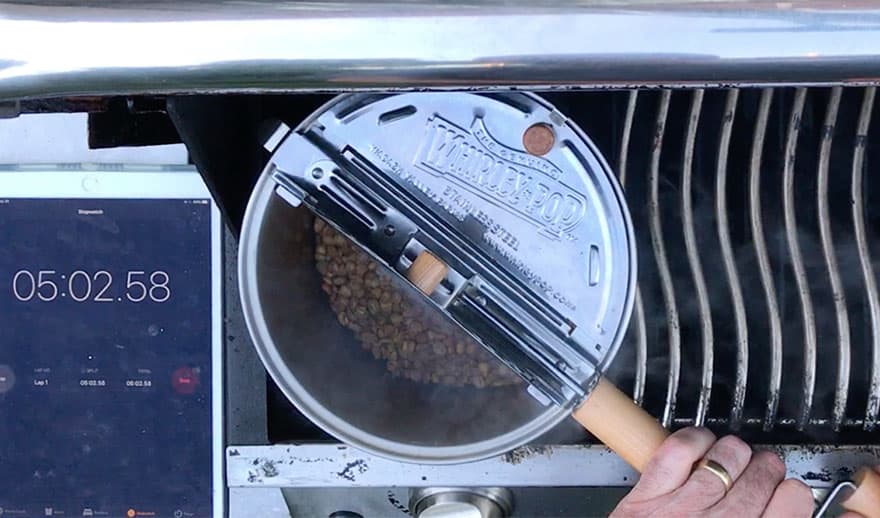
Step 4: Agitate the beans
The Whirley Pop makes agitating easy. Just turn the handle. Crank it at a fairly brisk pace—the more you agitate, the more even your roast will be.
The lid is closed to begin with because we want that high heat to remove any moisture from the beans quickly. You can lift the lid once per minute to take a quick peek at your beans and see how they’re doing.
Another thing I do every minute is reverse the spin of my Whirley Pop for a few rotations. This dislodges any beans that have become stuck under the rods near the center axle and keeps them from burning. A few turns is all you need, then back to your regular spin.
Step 5: Lift the lid
You start the heat high, but you want to slow down the rate of heating as the roast progresses. By peeking into the pot every minute, you’ll notice when the beans are starting to change color (they go pale before they go brown). That’s when it’s time to slow things down a bit by opening the lid of the Whirley Pop.
The first milestone in a coffee roast is called first crack, and it’s marked by the beans making a cracking sound as steam created by the evaporating moisture cracks the bean from the inside. It sounds like snapping toothpicks.
I aim to reach first crack sometime between the six- and nine-minute mark. If you don’t open the lid, you might get there too soon. If you open the lid and still get there too soon, then maybe next time also reduce the heat slightly when the beans begin to change color. These are the things you’ll get a feel for the more you roast.
Step 6: Reduce heat for development
When you’re unmistakably into first crack, it’s a good time to reduce the heat to medium or medium-low.
The time between first crack and second crack is called “development” time, and this is when most of the interesting stuff happens to your beans. If you pull your roast early during this period, you’ll have a light roast. If you take it all the way past second crack, you’ll have a dark roast.
Medium roast lies somewhere in between. Hopefully you know what you like.
But you don’t want this stage to happen too quickly. The coffee will taste better if these chemical changes are allowed to happen at a leisurely pace. Five minutes between the onset of first crack and the onset of second crack seems to work well. Your mileage may vary.
As you experiment, just know that the time between first and second crack is a key piece of the puzzle, and it all comes down to how much heat you’re applying. I’ll typically turn the heat down one more notch to low when I feel like I’m closing in on second crack.
If you lower the heat too much, too soon, you could stall the roast. This is when the beans become too cool to do their thing and the chemical changes just give up. The beans just kind of bake instead. You can still make coffee with them, but it will taste lifeless.
This has happened to me and it’s no big deal. Next time, just remember to keep the heat up a little bit longer. Eventually you’ll find the right balance.
What is the difference between coffee roasts?
Coffee beans start out with their own unique character, based on the plant they came from and the region and conditions in which they were grown.
Roasting brings out these unique flavors in coffee beans, but the more you roast them, the more alike they become. A light roast or medium roast will really highlight the unique taste of the beans you are using, and often taste floral, fruity and acidic. A dark roast will taste…well, roasted. There’s nothing wrong with that. Plenty of people love the warm, caramely, fireside flavors of a dark-roasted coffee.
But if you want to taste and appreciate what makes a bean special, it will be easier to do with a lighter-roasted coffee.
I took out a small sample every minute during a roast… 50 Shades of Arabica. from r/roasting
Step 7: Pull the roast
When you do this is up to you.
If you’re a dark roast fan like I am, you won’t do it before second crack. After second crack, you need to keep a very close eye on the beans. The roast accelerates at this point, and you can go from a nice dark roast to charred beans very quickly. The volume of smoke coming off the beans makes it a little difficult to see what’s going on.
lf anything, you should pull the roast before the beans get to where you want them. That’s because they are so hot that they will keep roasting for a minute or two after you remove them.
I have found that my best roasts on the grill typically last between 11-15 minutes, with first crack at 6-9 minutes.
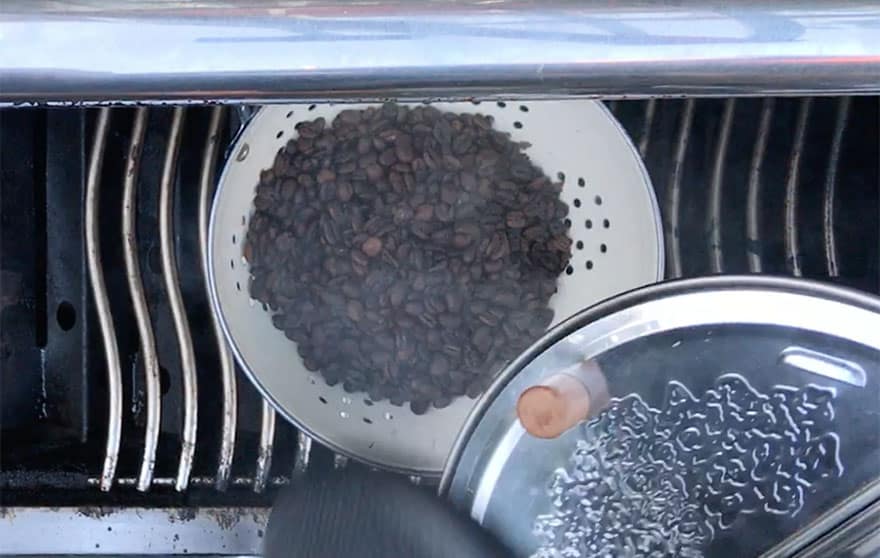
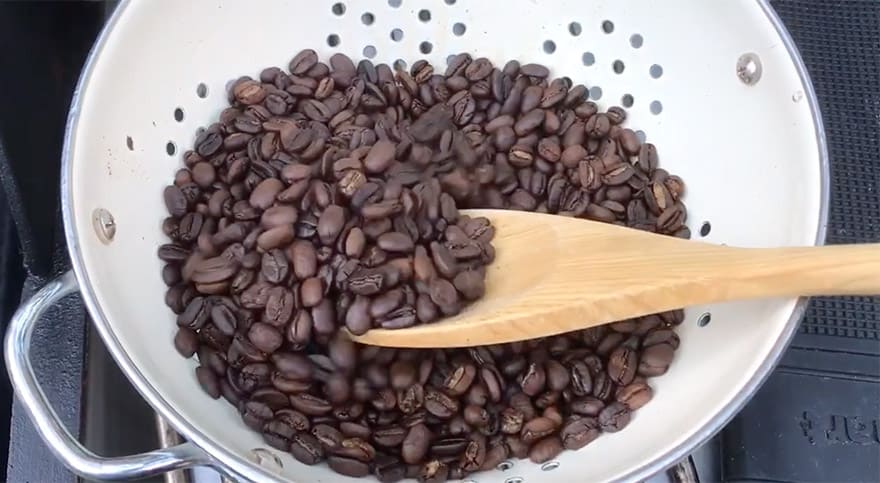
Step 8: Cool the beans
Using your oven mitt to steady the pot, lift the lid and pour the beans into your colander. Immediately begin stirring them with a wooden spoon. You’re trying to cool the beans as quickly as possible so they don’t continue to roast. Stirring them in the open air can do this.
You’ll notice some chaff flying off the beans. This is a flaky skin that dries up and comes loose from the beans during roasting. It’s a bit messy, but it’s also very light and most of it will drift away in the breeze as you stir. You can blow on the beans every 20 seconds or so to get rid of more chaff.
After several minutes, the beans will still be warm but safe to touch. By then, they have stopped roasting. Leave them out to cool further.
Step 9: De-gassing the beans
Roasting creates a lot of carbon dioxide gas within the beans. It will slowly seep out of them over the coming days. Most will be released in the first 24 hours. Don’t brew coffee until that has happened.
I degas my beans by placing them in a large Ziploc bag and laying it flat on the kitchen counter with the top open. This allows the gas to escape.
The beans will retain a little CO2 beyond the 24-hour mark, but by then you can brew with them and store them in an opaque, airtight container. They’ll be at their best from four to 14 days after roasting.
And that’s all it takes to roast coffee with a Whirley Pop.
If it sounds complicated, just realize that you don’t have to nail it the first time. This is all about trial and error.
What is important is keeping track of what you did each time, making sensible adjustments, and then trying again. If you repeat the process several times, you will get to drinkable coffee pretty quickly, and exceptional coffee eventually.
While I do believe you can get good enough by eyeballing it, some Whirley Pop roasters prefer to be more scientific and rig their pot with a thermometer. You can drill a hole in the lid of your Whirley Pop, insert a candy thermometer so it hovers a little above the blades, and use a spring clamp to hold it in place.
This allows you to track the temperature during every minute of the roast, and use heat adjustments to alter the temperature curve just the way you want. You don’t even need a computer. Just chart the time along the X-axis on a sheet of graph paper and the temperature on the Y-axis, and this will help you visualize your roast profile. Make some notes about how the coffee tastes. Decide how you’ll try to change that curve the next time you roast. See what happens.
If you become addicted to this—and you might—consider reading Kenneth Davids’ book called Home Coffee Roasting. It’s the bible.
Where to get a Whirley Pop
Many well-stocked kitchen warehouse stores carry the Whirley Pop, but you can save yourself a lot of time and effort by simply ordering on Amazon. If you order by clicking on this link, Bean Poet will earn a small commission from your purchase.
Where to get green coffee beans
Many craft coffee roasters in your community may sell raw coffee beans. Just call ahead to ask. You can pick up a small quantity for your first few experiments.
As you refine your process and start roasting coffee to your liking, you may want to invest in larger batches of raw coffee. They will keep for a long time. For this, you can order online and have them delivered to you for a small shipping fee. Buying in volume can justify the shipping fee.
Sweet Maria’s is the place to order in the U.S. If you’re in Canada as I am, you can get a great selection and prompt shipping from Green Beanery.