Just so you know, as an Amazon Associate we earn from qualifying purchases made via bold red links, buttons or images.
Last Updated on December 10, 2023
You can brew your morning coffee any number of ways. Drip machines are by far the most popular method, but they do require some preparation and cleanup time after brewing your coffee.
Other traditional methods such as French press or stovetop moka pots are also cumbersome enough to slow down your busy morning routine, and they require more involved cleaning of their own.
For those who want a quick, easy cup of coffee without sacrificing quality, the AeroPress is a lifesaver. It may have a “hipster” reputation as a favorite amongst baristas or coffee geeks, but the AeroPress is a quick, easy way to make a delicious cup of coffee in any home—and maybe yours.

In this post we”ll consider the pros and cons of the AeroPress, and how to go about making your coffee with one of them.
What is an AeroPress?
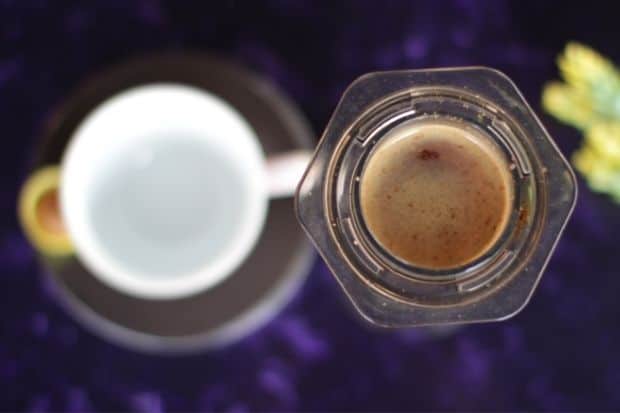
The AeroPress is a small, mostly plastic device that uses manually applied pressure to make coffee. It’s composed of three very simple parts: an outer cylinder, an inner plunger with a rubber gasket seal on the end, and a screw-on cap filter.

You put ground coffee in the top of the cylindrical chamber, pour hot water into it, let it brew, and then plunge the water and coffee through the paper-lined filter into your cup.
The AeroPress has been around since 2005. It was designed as an easy way to make coffee without expensive equipment. The inventor, Alan Adler, wasn’t exactly a stranger to developing new products, either—he also invented the Aerobie Pro flying ring.
Adler designed the device for convenience and simplicity, making it from BPA-free materials so there aren’t any harsh chemicals to worry about leaching into your coffee. The AeroPress is also lightweight, environmentally friendly, and durable enough to be used on camping trips or by backpackers. And of course, its simple design means that it’s easy to clean up.
How to use an AeroPress
Using an AeroPress couldn’t be easier. But there are two ways to do it.
Regular method
Just screw on the filter-lined cap and then put your ground coffee beans into the chamber. Position the device on the rim of your coffee cup and pour hot water over the grounds until you reach your desired volume.

Don’t use boiling water with an AeroPress. Instead, just take the water off the heat once it starts bubbling and wait about 30 seconds before pouring it onto your coffee grounds. The preferred water temperature is between 75 and 85 C, or 170 and 185 F.
Give your coffee a quick stir, then gently insert the plunger so that the rubber seal sits snugly and level inside the top of the cylinder.
Press the plunger steadily down for about 30 seconds, then serve.
Inverted method
That’s the traditional method, but AeroPress aficionados have also invented the inverted method that allows you to use coarser coffee grounds and let them steep a bit longer.
With the inverted method, you don’t screw the cap on immediately. Instead, the first thing you do is insert the plunger so the gasket forms a good seal just inside the top of the cylinder, and then you flip everything over so that the device is now resting on the plunger:

Now you can deposit your coffee grounds and hot water into the opening where the cap will eventually go. Give it a stir and let it steep for a while as you screw the filter cap on.
When you’re ready, put your coffee cup on the counter and then flip the entire device over and position it on the cup with the filter cap facing down.
Press the plunger down and serve.

There are lots of AeroPress recipes online, and it’s a great tool for experimenting with grind size, steeping time, and coffee-to-water ratio. Try it a few different ways and see what you like.
Let’s take a look at AeroPress pros and cons.
Advantages of using an AeroPress
Most of the benefits of using AeroPress are related to its coffee-making process.
All-in-one unit
Unlike French presses or drip machines, the AeroPress doesn’t require any extra equipment to make your coffee. You don’t need a carafe, filters, or electricity. Everything that you need is right in the chamber. This makes it easy to make a cup of coffee with very little fuss.
Easy to clean
Since the AeroPress is a one-piece unit, you don’t have to worry about cleaning a separate carafe or filter. You just unscrew the filter cap and plunge the coffee grounds right into your compost. Then disassemble the cylinder and plunger and give them an easy rinse in the sink. The AeroPress is also dishwasher safe, so no more hand-washing for you.
Good for the environment
The AeroPress is environmentally friendly, allowing you to make a cup of coffee quickly and effectively without the need for filters that can collect in landfills. Now you can drink coffee with a clear conscience!
Affordable brewing option
In addition to being easy to clean, the AeroPress is also a pretty inexpensive way to brew coffee. It’s often less than even some of the cheapest drip machines on the market.
Disadvantages of using an AeroPress
As great as this brewing method is, there are a few downsides worth mentioning before using one for yourself.
Doesn’t retain heat well
AeroPress coffee isn’t very good at retaining heat. It can get cold faster than you might expect. This can be a downside for those who prefer their coffee piping hot. I recommend warming your cup well with hot water just before you brew into it. That will keep things hot longer.
Easy to knock over
When an AeroPress is sitting on your cup with the plunger up, it’s almost a foot tall and very narrow. You need to be careful when moving around your kitchen, because one stray elbow could make a real mess. This is especially true when using the inverted method, because all the weight of the water is in the top half of the device.

Less control over coffee strength
While the AeroPress gives you some control over strength (more water equals weaker brew), it doesn’t offer nearly as much precision as some other brewing methods. It’s quite easy to over-extract coffee and get a slightly bitter taste. You’ll need some trial and error to figure out what’s going to work. After that, you’re golden.
One cup at a time
If you’re looking for a quick and easy way to brew more than one cup of coffee at a time, an AeroPress isn’t for you. While there are lots of how-to guides available online if you want to try brewing multiple cups with this method, it’s not nearly as convenient as simply having a brewer with a carafe.
AeroPress brewing tips
If you want to brew the best tasting coffee with your AeroPress, there are a few things that you can try.
Experiment with grind size
You’ll usually get better results using a slightly finer grind than you would with drip or pour-over methods, but the opposite is true if you use the inverted method—then you might want to set your coffee grinder to a coarser setting. Either way, it won’t take long to brew. Coarsely ground AeroPress coffee doesn’t need to steep as long as French press coffee, because the pressure of the plunge accelerates extraction.
Brew shorter times
When you use an AeroPress, shorter brewing times help preserve the flavor of your coffee. Try pressing your coffee for 20 to 30 seconds and steep it for about one minute total if possible.
Use less coffee grounds
Try using two scoops of grounds with every cup of water you use instead of the typical three for a stronger brew.
Is AeroPress coffee right for you?
Do you want to make one or two cups of coffee at a time? Do you care whether the device is easy to clean or not? Decide what your biggest priorities are and go from there.
While there are some downsides to using an AeroPress, most of them can be eliminated with a few simple tips. It’s also the easiest way to make a quick cup of coffee without any extra equipment, so it’s a great choice if you want to eliminate some clutter from your kitchen.
AeroPress Coffee Maker
The AeroPress has really taken the world by storm since its introduction in 2005. It offers an excellent way to brew great-tasting coffee, and it can even be used with loose tea leaves to make tea lattes. Also, there are many AeroPress accessories available to enhance your coffee-making experience.
Give this brewing method a try and let us know how it goes by leaving a comment on our Facebook post.