Just so you know, as an Amazon Associate we earn from qualifying purchases made via bold red links, buttons or images.
Last Updated on November 24, 2024
If you’re ready to graduate from your basic, run-of-the-mill espresso machine into a world of more sophisticated brewing, a new espresso machine from Seattle Coffee Gear might be the one for you.
The Diletta Mio is a genuine Italian-made espresso machine that has been making waves in the coffee industry. I just spent three weeks with one.
If you’re like me, you might be looking for a high-quality espresso machine that won’t break the bank. That’s exactly what makes the Diletta Mio so intriguing: It comes in at a lower price point than other high-end espresso machines, without much of a compromise on quality.
The most important features are all there, and they’re all solid.
The Mio is a collaboration between Seattle Coffee Gear and the Italian manufacturers of the Quick Mill brand. It’s SCG’s first attempt to market their own exclusive brand of espresso machine, and they kinda nailed it.
So read on as I tell you everything you need to know about the Mio—from its design and features to the taste of the espresso it produces.
We’ll start with a quick recap of what I liked best, and what left me a little bit cold. Let’s get brewing.
Things I Liked
- Value for the money
- Simplicity of operation
- Fast heating
- Ability to steam immediately after brewing
- Convenient water reservoir location
- Cup warmer atop boiler
- Hefty, sturdy portafilter
Things I Didn’t Like
- Low cup clearance
- Doesn’t dispense hot water
- No pressure profiling for advanced users
- Two buttons knocked askew during shipping
Place in the Market
The Diletta Mio seems to have found a soft spot in the semi-automatic espresso machine market where there isn’t a lot of competition.
It’s an undeniable step up from the ever-popular Rancilio Silvia and Gaggia Classic Pro, which have long jostled to attract home baristas who are just starting to get serious about espresso.
But it’s significantly more affordable than the Rocket Appartamento, ECM Classika or Lelit Mara X, which have been typical next steps for those graduating from entry-level machines.
For what it’s worth, this machine’s whole vibe feels more like the pricier machines than the cheaper ones—at least to me.
The only real competition for Diletta in this middle ground is the Quick Mill Silvano Evo—which isn’t surprising given that Quick Mill manufactures the Diletta brand on behalf of Seattle Coffee Gear. Hence, the Mio bears a remarkable resemblance to the Silvano and probably shares a lot of its DNA.
How It Came About
Seattle Coffee Gear is one of the biggest online coffee retailers in the country, and Diletta is their first foray into making their own house brand of espresso machine.
“We’re actually pretty big coffee nerds here at SCG,” explained Kelli Rognlie, associate director of marketing for Seattle Coffee Gear. “We sell machines we actually like to use, because we want to deliver the kind of experience to customers that we enjoy.”
They enlisted the engineering expertise of Stefano Chinaglia and Angelo Maccarone of Quick Mill, and came up with two machines that launched the Diletta line: the Mio and the slightly pricier Bello. Both are manufactured near Milan, making this a true American-Italian collaboration.
“Our product development team has spent years testing and evaluating machines ranging from every price point and feature. This was our chance to take a machine and rework certain features to make a machine that they have always wanted,” said Rognlie.
What Makes It Unique
Two things really make the Mio stand out from its lower-priced competitors (and if even some of its higher-priced ones):
- its ability to transition immediately from brewing to steaming
- its energy-saving features
Let’s take a closer look at both.
Brewing and Steaming
The Diletta Mio is a single-boiler espresso machine. Generally, one of the drawbacks of single-boiler machines is that you can’t steam milk and brew in quick succession; you have to steam milk first and then wait for the boiler temperature to rise about 40 degrees before you brew.
The Mio solves this problem by keeping the steaming circuit separate. The steaming circuit has its own pump and its own thermoblock heating element to heat water on demand.
With this setup, you can pull your shot first and then immediately turn to steaming milk. And you can do this for several drinks back-to-back. It’s great.
Energy Efficiency
The steaming circuit we just discussed has its own on/off switch. So if you don’t intend to steam, you can just leave it off and only the main boiler will require heating power. That really cuts down on the energy requirement.
Eco Mode
The other nice energy-saving feature is something they call Eco Mode. It’s basically like an auto shut-off feature that you can program using the PID display and its buttons. You decide how long you want the machine to stay ready to brew. If you set Eco Mode for one hour, the machine will power down into energy-saving mode after an hour of inactivity.
Sadly, I didn’t get a chance to try this out on the machine Seattle Coffee Gear sent me. Some shifting in the box during shipping caused the PID buttons on this machine to get a bit jammed. With some persistence I could use them to adjust the temperature, but they weren’t responding well enough for more advanced programming.
I chalk this up mostly to bad luck, but making those buttons a little more hardy might be a change for the designers to consider. Otherwise, Eco Mode is a welcome feature.
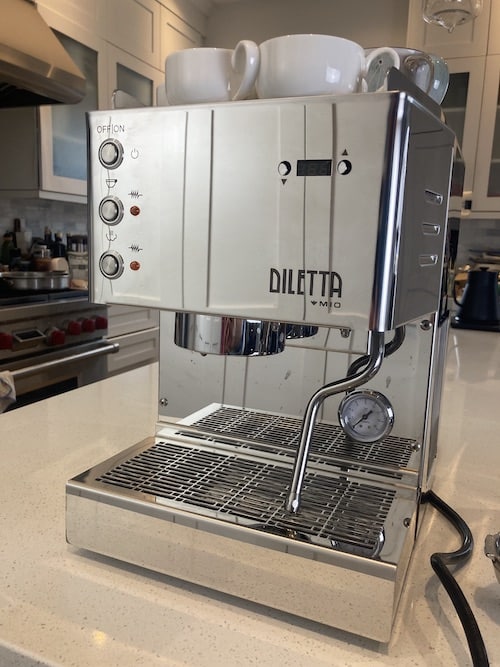
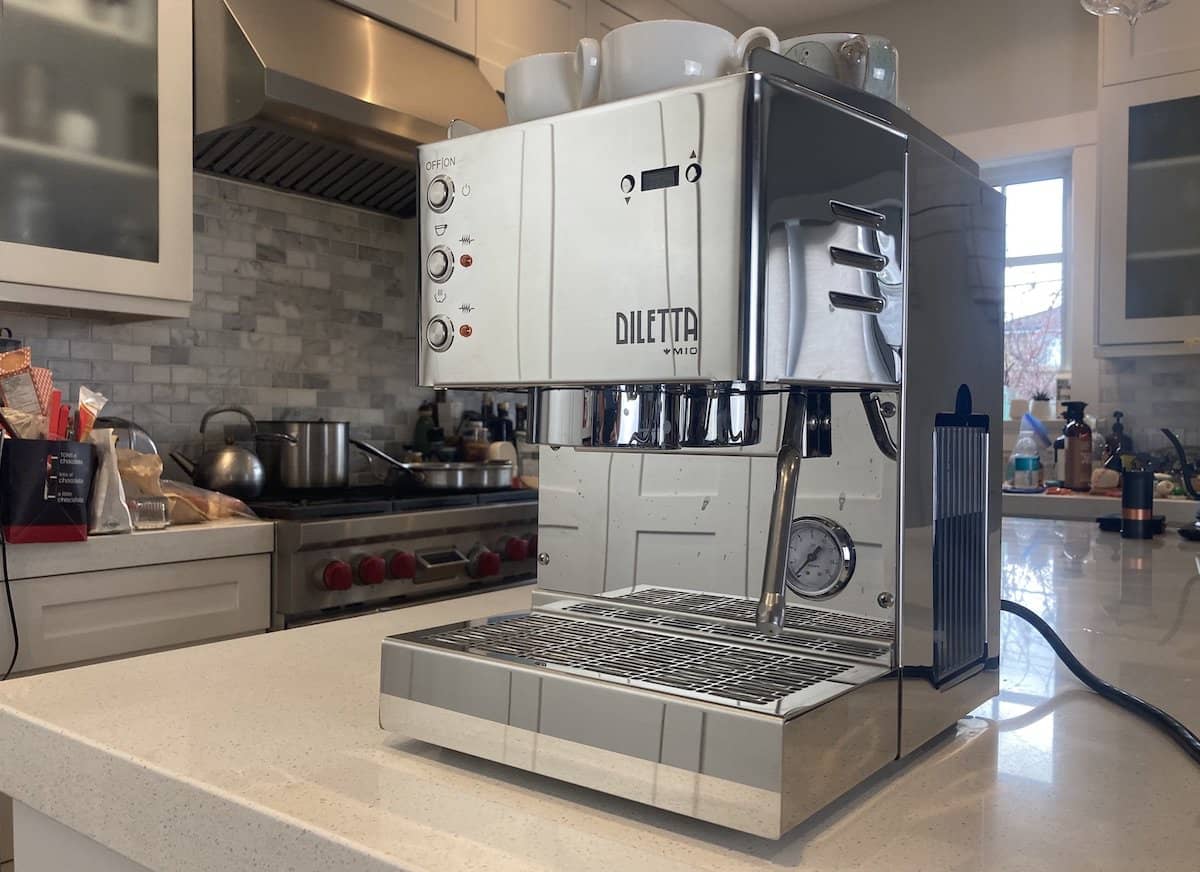
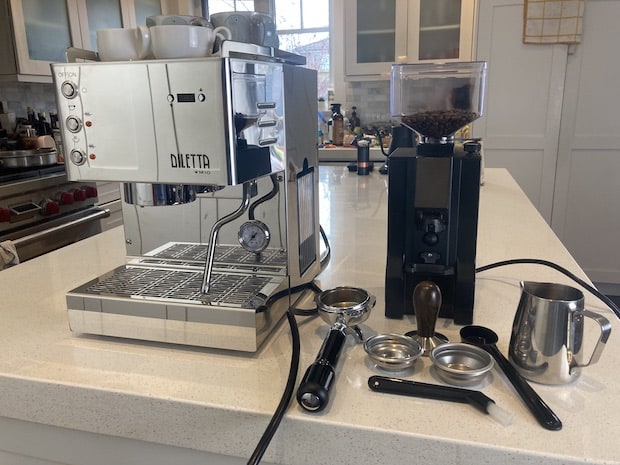
Design and Build Quality
I wasn’t sure exactly what to expect from an espresso machine in this price range. The Mio’s appearance had seemed a bit basic and boxy in the pictures I saw, but when it arrived in real life it looked great. Just a really classic, no-nonsense look with clean lines and gleaming stainless steel. (You’ll see I had to contort myself to keep my reflection out of these pictures!)
Lifting it out of the box, I could feel its heft and solidity. Sturdy rubber feet under each corner kept it anchored to the kitchen counter without any sliding around or marks to the counter.
It is basically a box, but the casing along the sides tapers toward the front of the machine to give it a slightly sleeker look without having everything at right angles.
The machine I got was all shiny metal, right down to the rail that keeps the cups from falling off the edge of the cup warmer on top. If you don’t care for so much reflective metal, they also offer versions with matte black and matte white casing that look pretty good as well.
Other than the issue I mentioned above with the PID buttons—which may have been a one-off—nothing about this machine felt cheap or flimsy. It felt like the real deal, and I found myself liking the simplicity of its design more than I expected to.
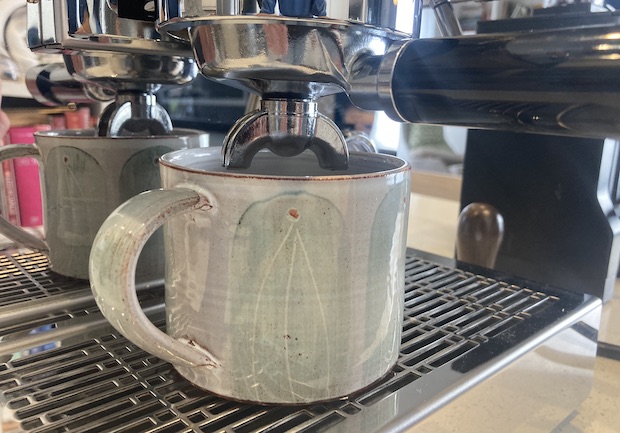
My only complaint about the design is the low cup clearance. My favorite cups aren’t particularly huge, only about three inches tall. It was easy enough to place them under the spout, but wrestling them out after brewing was quite an ordeal. To do so without spilling any liquid into the drip tray required care and concentration. I could have used another half-inch of clearance.
How It Performs
Brewing
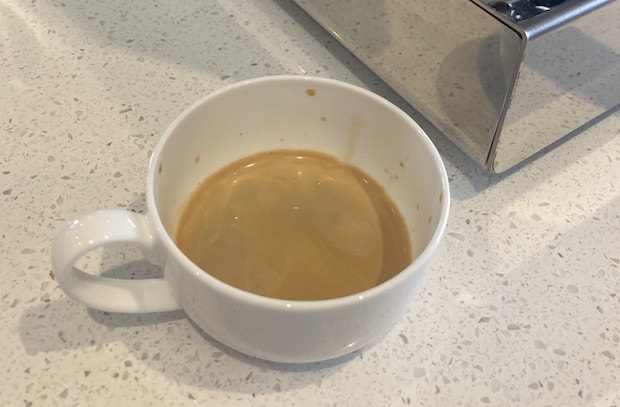
The most important question, of course, is whether the Diletta Mio makes good coffee.
I can assure you it does—as long as you have some idea what you’re doing. Remember, this is a semi-automatic machine, so you’re not going to just push a button and have the machine mix you a nice double latte. You need to be the barista, and that takes a bit of basic knowledge and practice.
But once you’ve figured out how fine to grind your beans and how heavy to tamp your grounds, this machine can make top-notch espresso.
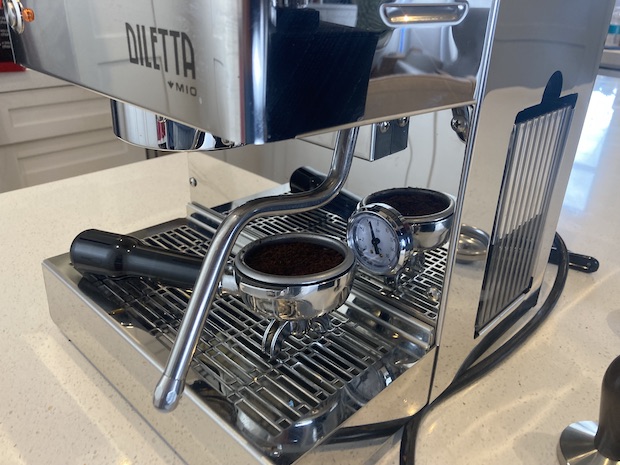
The 58mm double-spout portafilter comes with single and double filter baskets. I used the double basket a lot, whether I intended to split the shot or just brew into a single cup.
My first attempt to pull two shots at once into separate cups was a bit pathetic. I could see espresso pouring much more heavily out of one spout than the other. I wondered if it was a machine flaw, but no, it was user error. On my second attempt, I put much more care into leveling the grounds in the portafilter and tamping them evenly. From that point on, I could easily pull two identical shots at once with a nice, even stream pouring from each spout.
This is actually a great machine for correcting your barista techniques. Because it brews at such a consistent temperature, you can really focus on other variables like your grind, tamping and dose to get your coffee the way you want. The feedback is immediate, and the machine is responsive to your changes on each ensuing brew.
Advanced users might wish the machine allowed for pressure profiling, but that’s asking a lot for a machine at this price point, in my opinion.
A word of caution if you’re a big Americano drinker: The Mio does not have a hot water dispenser. This might be a significant drawback for you. If you want to top up your espresso with hot water, you have two options:
- Clean your portafilter and then run a brew cycle through it without any coffee
- Boil water separately
It wasn’t a big deal for me, because I had my fast-heating electric kettle right next to the machine. But it will be a problem for some.
Steaming
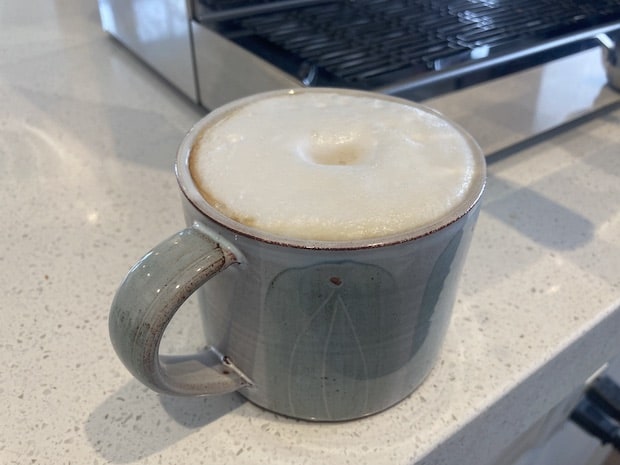
I quite enjoyed steaming milk with the Mio.
It’s not a super high-powered steam wand so it doesn’t steam as quickly as some, but it’s also easier to control. With high-powered steamers it feels like you need to be laser-focused just to prevent yourself from accidentally blasting milk all over your kitchen, but the Mio is much more chill than that. Take it slow, keep the tip of your wand in the right place, and in less than a minute you end up with a nice pitcher of properly foamed milk for your cappuccino, flat white, latte or macchiato.
The unit comes with two wand tips—one with a single hole and one with two holes.
User Experience
The Mio provides a straightforward user experience that is unlikely to confuse anyone.
There are only six buttons on whole machine, and two of them you probably won’t use a whole lot.
The three buttons lined up vertically at top left are the important ones. They are, in descending order from the top:
- power on/off
- brew
- steam
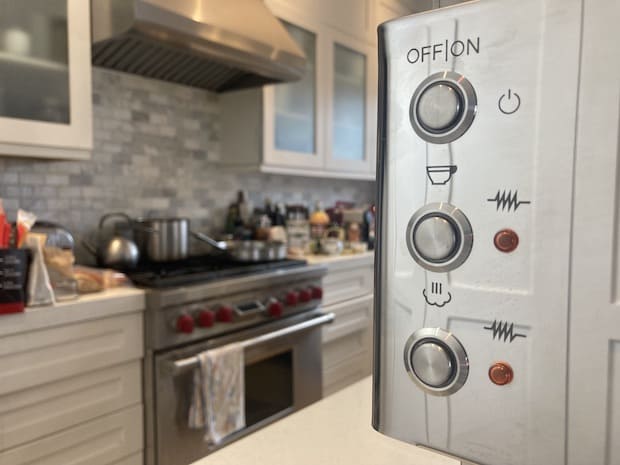
Because the steamer operates on a separate circuit, you’ll find one more button on the left side of the machine that powers the steam circuit on and off. Conserve energy by keeping this turned off if you don’t plan to steam.
And those are really all the essentials. Both the “brew” and “steam” buttons are one touch to start, and another touch to stop.
PID Controls
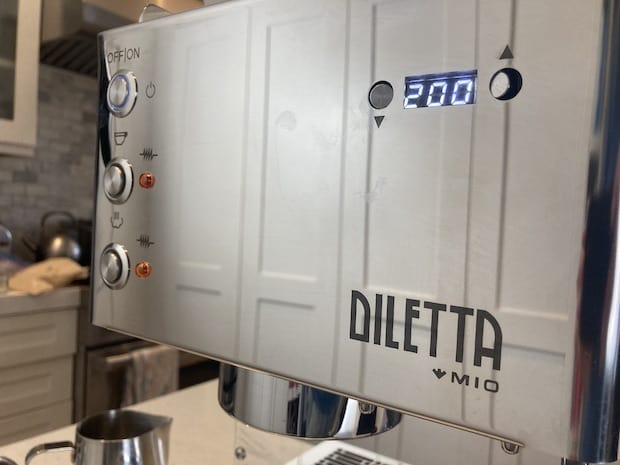
I’ve covered four of the buttons. The other two sit on the right side of the front panel, flanking the PID display. They allow you to adjust the water temperature if necessary, or set the time that you want the machine to slip into energy-saving Eco Mode.
Although the PID buttons on this particular unit had gotten jammed inside the casing during shipping and were difficult to access, I was able to operate them using the small end of a chopstick. They offer precise control over temperature. It was fairly easy to reduce temperature by one degree at a time, even using this awkward workaround.
I appreciate that the Mio let me set the temperature precisely, and maintained that temperature consistently from shot to shot. It’s nice to be able to rely on a consistent temperature so you can just play around with other brewing variables such as dose, grind and tamping pressure.
Heating Time
You can watch the PID display as the machine heats up to know when it has reached brewing temperature. I found that the Mio heated up really quickly—less than three and a half minutes to get to 200 F. Fast heating is one of the benefits of the relatively small 13.5-ounce brass boiler.
Shot Timer
Once you hit the “brew” button, that PID display transforms immediately and automatically into a shot timer, so you can count the seconds that the water is flowing. For me, 27 seconds turned out to be the sweet spot and I could easily stop the brew with one touch once I got there.
Noise
No espresso machine is silent, but I give credit to these folks for building a machine that won’t wake up the house. Yes, it’s more than a hum. Some might call it a buzz. But it’s not loud. Honestly, we use a Nespresso machine pretty regularly at our place and its barely louder than that. Not bad at all.
Notable Features
Let’s take a look at a few other features you might be wondering about, starting with the water tank.
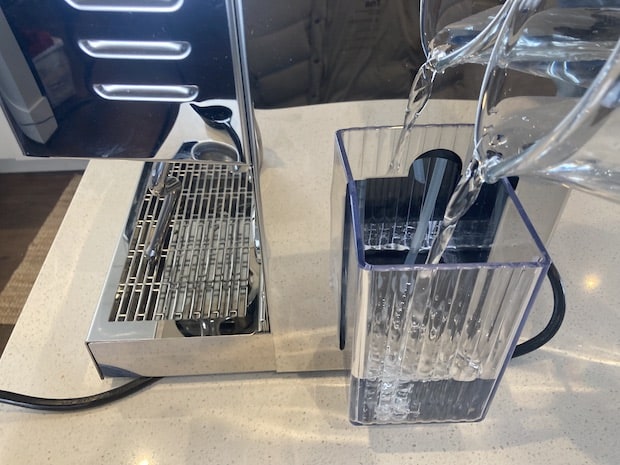
Water tank
The water reservoir location on the Diletta Mio is really discreet and practical.
There’s a cavity in the side of the machine that holds the water tank, and it just slides in and out of there like a drawer. You can remove it and carry it to the sink if you want, but then you’d have to wriggle it out from under the intake hoses. I found it easier to just slide the reservoir halfway out and top it up with water from a lemonade jug or something like that. Slide it back in and you’re good to go.
The tank is dishwasher-safe and holds a great deal of water. I filled it with 54 ounces (1.6 liters) and still had plenty of clearance at the top to carry without spilling.
If there’s one feature I’d like to see on future editions of this machine, it’s a water-level sensor with a warning light to tell you when the water reservoir is low. On a sleepy morning when you haven’t yet had your first cup of coffee, you don’t always think about whether the tank might be running dry. I had to abort a couple of my espresso shots halfway through when I realized nothing was coming out of the portafilter spout—the tank had run out of water.
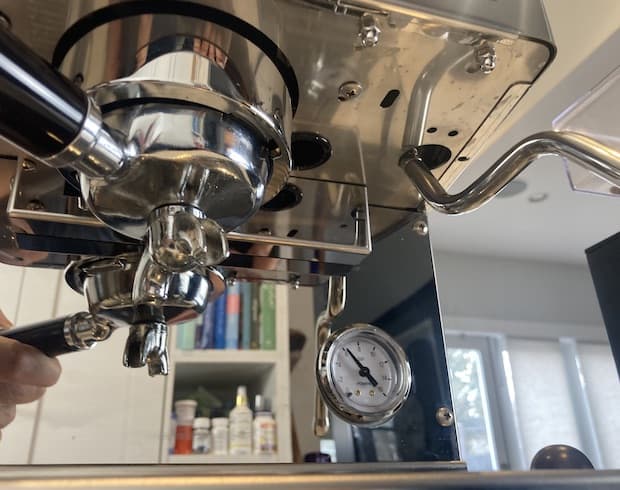
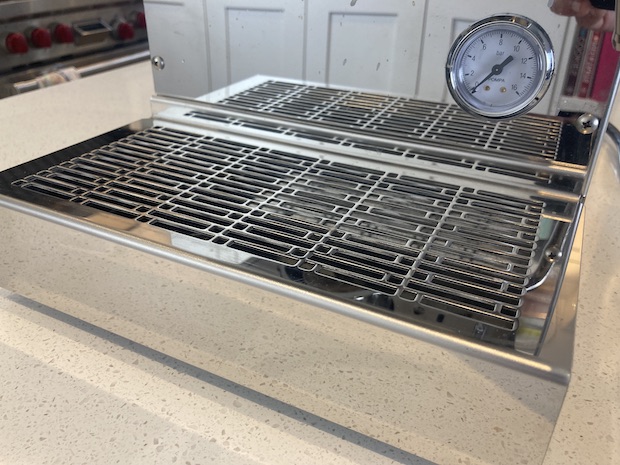
Pressure Gauge
I didn’t have much confidence in the Mio’s brew pressure gauge. I’m not a super sophisticated barista so I’m not exactly sure how these things are supposed to work, but I do know that nine to 15 bars of pressure is the sweet spot.
When I started pulling a shot, the gauge would sit at zero until about the eight-second mark, when it would shoot up to three. It would stay there until I stopped the water flow, then it would immediately shoot up to 11 or so, and slowly fall back down to zero from there.
I’m pretty sure that’s not how things are supposed to go. I don’t think it was barista error, because I was getting really nice shots of espresso, so my assumption is that the gauge wasn’t working properly. I could be wrong about this. I don’t know enough about it.
If you’re not a person who’s fussy about knowing the pressure while you brew, it doesn’t really matter. This isn’t a machine that allows you to adjust pressure in mid-shot anyway.
You can, apparently, adjust the general brew pressure via an OPV valve that’s relatively easy to access with a screwdriver through a hole near the brew head. It’s too much fuss to do from shot to shot—more of a set-it-and-forget-it sort of thing.
Drip tray
The Mio’s drip tray is about two inches deep and quite easy to remove and clean. It’s a steel drawer that slides snugly into place under the brew group and then you cover it with a steel grate that kind of hooks onto a rail along its back edge. Simple and effective.
Cup warmer
The top of the machine will warm your cups nicely. I had no problem fitting four 10-ounce cappuccino mugs and four demitasses onto the surface. Don’t be shy about packing them in, either—a shiny, two-inch-high rail along the back and sides will keep anything from sliding off.
One nice thing about the Mio’s design is that the boiler is positioned at the top of the machine, directly between the brew head and the cup-warming surface. Not only does this help with the consistency of temperature that I talked about earlier, but it also means that your cups near the front of the machine will be good and warm. It’s toasty up there!
What it Comes With
- Double-spout portafilter (58mm) made of chrome-plated brass
- Single-shot filter basket
- Double-shot filter basket
- Blank basket for flushing the machine
- 58mm tamper (heavy stainless steel with comfortable wood handle)
- Extra steam wand tip
- Group brush
- Plastic coffee scoop
- Power cord (about five feet long)
Specifications
| Dimensions | 10.5" W x 13" D x 14 3/4" H |
| Weight | 44 pounds |
| Watts | 1600 |
| Volts | 120 |
| Amps | 15A |
| Boiler material | brass |
| Boiler volume | 400 mL |
| Reservoir volume | 2 L |
After spending three weeks with this machine, I think Seattle Coffee Gear may have something here with the Diletta Mio. As far as I can tell, it’s the least amount of money you can spend for a big-boy espresso machine that really makes you feel like you aren’t just dabbling.
I don’t mean any disrespect to the Gaggia Classic Pro or the Rancilio Silvia, because I know they have their devoted followers. They wouldn’t be such well-known names if they weren’t filling a significant gap in the market. But as I roll along on my espresso journey, I just don’t believe that price point would ever be a stop on my route.
Having already invested a few hundred dollars in a casual machine from Bed, Bath & Beyond or some such place, I would want my next step up to really be a step up. I’d be looking for a machine that I could grow old with, and never yearn again for something better. I wouldn’t feel that way with the Gaggia or Rancilio. With the Diletta Mio, I think I would.
Yes, I know there are better machines out there. I’m just not sure I need them. And I’m not sure you do, either.